어떻게 피그마를 코드로 변환할 수 있을까?
피그마 플러그인에서 react, code 등의 키워드로 검색해보았다.

그 중 다운로드 수가 제일 많은 플러그인 4가지를 추려봤다.
참고로 Figma to Code랑 Anima는 피그마에서 기본으로 추천해주는 플러그인 인 듯하다.


4개의 플러그인 중에서 무엇을 사용할지 결정하기 위해서 피그마에서 만든 아래의 동일한 페이지를 각각의 플러그인을 이용하여 React 코드로 변환시켜 비교해보았다.

1. Figma to Code
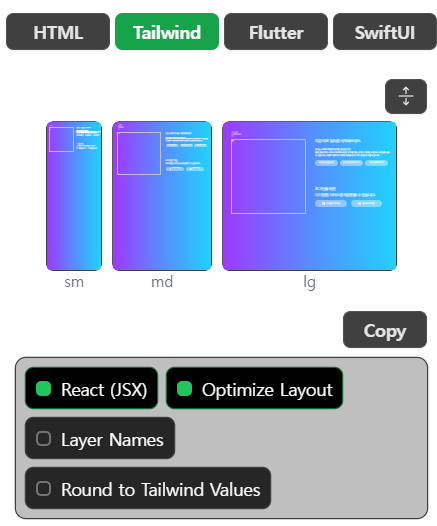
선택할 수 있는 옵션이 다양하지 않다.
<div className="w-[1534px] h-[862.50px] relative bg-gradient-to-l from-cyan-400 via-cyan-400 to-purple-600">
  <div className="w-[1400px] h-[600px] left-[67px] top-[145.18px] absolute justify-between items-start inline-flex">
    <img className="w-[660px] self-stretch" src="https://via.placeholder.com/660x600" />
    <div className="w-[660px] self-stretch flex-col justify-between items-start inline-flex">
      <div className="self-stretch h-[229px] flex-col justify-start items-start gap-[30px] flex">
        <div className="justify-center items-center gap-2.5 inline-flex">
          <div className="text-white text-opacity-80 text-[32px] font-semibold font-['IBM Plex Sans KR']">지금 바로 필사를 시작해보세요.</div>
        </div>
        <div className="self-stretch text-white text-lg font-normal font-['NanumGothic']">필사는 외국어 학습에 유익한 방법입니다. <br/>좋은 글을 따라 쓰면서 어휘력과 문장 구조를 향상시키며, 다양한 표현과 스타일을 배울 수 있습니다. 더불어 문화적 이해와 자극을 받아 자기 향상에 도움이 됩니다.</div>
        <div className="self-stretch justify-start items-start gap-5 inline-flex">
          <div className="w-[200px] h-[50px] px-5 py-2.5 bg-white bg-opacity-40 rounded-[50px] justify-center items-center gap-2.5 flex">
            <div className="text-white text-opacity-70 text-xl font-semibold font-['IBM Plex Sans KR']">ai 글감 생성하기</div>
          </div>
          <div className="w-[200px] h-[50px] px-5 py-2.5 bg-white bg-opacity-40 rounded-[50px] justify-center items-center gap-2.5 flex">
            <div className="text-white text-opacity-70 text-xl font-semibold font-['IBM Plex Sans KR']">인기 글감 둘러보기</div>
          </div>
          <div className="w-[200px] h-[50px] px-5 py-2.5 bg-white bg-opacity-40 rounded-[50px] justify-center items-center gap-2.5 flex">
            <div className="text-white text-opacity-70 text-xl font-semibold font-['IBM Plex Sans KR']">직접 업로드하기</div>
          </div>
        </div>
      </div>
      <div className="self-stretch h-44 flex-col justify-start items-start gap-5 flex">
        <div className="justify-center items-center gap-2.5 inline-flex">
          <div className="text-white text-opacity-80 text-[32px] font-semibold font-['IBM Plex Sans KR']">로그인을 하면 <br/>더 다양한 서비스를 제공받을 수 있습니다.</div>
        </div>
        <div className="self-stretch justify-start items-start gap-[30px] inline-flex">
          <div className="w-[280px] h-[60px] px-[30px] py-2.5 bg-white bg-opacity-40 rounded-[50px] justify-center items-center gap-2.5 flex">
            <div className="grow shrink basis-0 h-[26px] justify-center items-center gap-2.5 flex">
              <div className="w-6 h-[26px] relative" />
              <div className="text-center text-white text-opacity-70 text-xl font-semibold font-['IBM Plex Sans KR']">Google 로그인</div>
            </div>
          </div>
          <div className="w-[280px] h-[60px] px-[30px] py-2.5 bg-white bg-opacity-40 rounded-[50px] justify-center items-center gap-2.5 flex">
            <div className="grow shrink basis-0 h-[26px] justify-center items-center gap-2.5 flex">
              <div className="w-6 h-[26px] relative" />
              <div className="text-center text-white text-opacity-70 text-xl font-semibold font-['IBM Plex Sans KR']">Apple 로그인</div>
            </div>
          </div>
        </div>
      </div>
    </div>
  </div>
  <div className="left-[74px] top-[65px] absolute text-white text-opacity-30 text-[40px] font-normal font-['Pacifico']">fillsa</div>
</div>
2. Anima
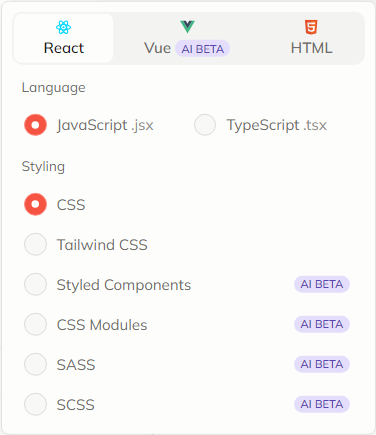
언어와 css 스타일링을 변경할 수 있다.
import React from "react";
import { DivWrapper } from "./DivWrapper";
import { Icon } from "./Icon";
import { IconComponentNode } from "./IconComponentNode";
import { PropertyWrapper } from "./PropertyWrapper";
import "./style.css";

export const IntroPage = () => {
    return (
        <div className="intro-page">
            <div className="div">
                <div className="frame-2">
                    <img
                        className="writing-with-a-big"
                        alt="Writing with a big"
                        src="writing-with-a-big-pencil-4910556-4090719-1.png"
                    />
                    <div className="frame-3">
                        <div className="frame-4">
                            <DivWrapper className="view" text="지금 바로 필사를 시작해보세요." />
                            <div className="flexcontainer">
                                <p className="text">
                                    <span className="span">
                                        필사는 외국어 학습에 유익한 방법입니다. <br />
                                    </span>
                                </p>
                                <p className="text">
                                    <span className="span">
                                        좋은 글을 따라 쓰면서 어휘력과 문장 구조를 향상시키며, 다양한 표현과 스타일을 배울 수 있습니다.
                                        더불어 문화적 이해와 자극을 받아 자기 향상에 도움이 됩니다.
                                    </span>
                                </p>
                            </div>
                            <div className="frame-5">
                                <PropertyWrapper property1="two" text="ai 글감 생성하기" />
                                <PropertyWrapper property1="two" text="인기 글감 둘러보기" />
                                <PropertyWrapper property1="two" text="직접 업로드하기" />
                            </div>
                        </div>
                        <div className="frame-6">
                            <DivWrapper
                                className="view"
                                text={
                                    <>
                                        로그인을 하면 <br />더 다양한 서비스를 제공받을 수 있습니다.
                                    </>
                                }
                            />
                            <div className="frame-7">
                                <PropertyWrapper icon={<Icon className="image" />} property1="one" text="Google 로그인" />
                                <PropertyWrapper icon={<IconComponentNode className="image" />} property1="one" text="Apple 로그인" />
                            </div>
                        </div>
                    </div>
                </div>
                <div className="text-wrapper-2">fillsa</div>
            </div>
        </div>
    );
};
3. Builder.io
웹 사이트를 따로 제공하며, chat gpt처럼 코드를 어떻게 커스텀하고 싶은지 명령을 내릴 수 있다.
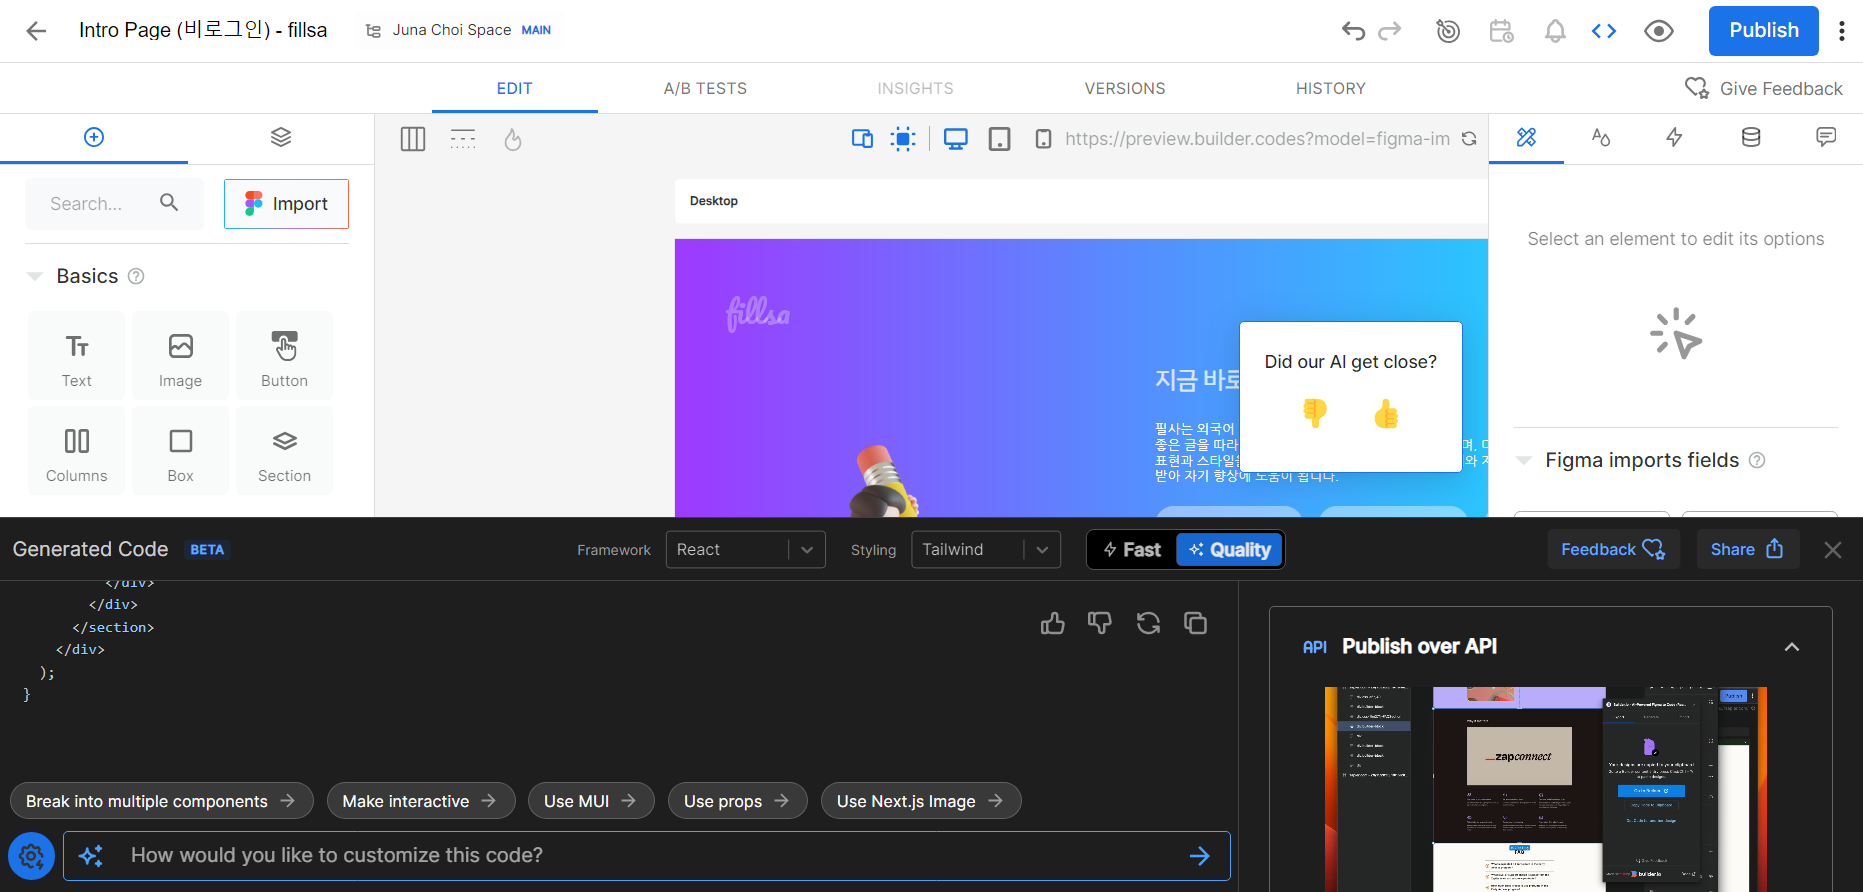
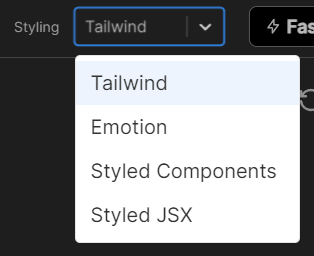
하지만 CSS 스타일링 옵션은 다양하지 않은 것 같다.
import React from "react";

function UpdatedComponent(props) {
  return (
    <div className="flex flex-col items-stretch px-16 py-12 max-md:px-5">
      <header className="text-white text-opacity-30 text-4xl mt-3 max-md:max-w-full">fillsa</header>
      <section className="justify-between mt-8 mb-11 max-md:max-w-full max-md:mb-10">
        <div className="gap-5 flex max-md:flex-col max-md:items-stretch max-md:gap-0">
          <div className="flex flex-col items-stretch w-6/12 max-md:w-full max-md:ml-0">
            <img
              loading="lazy"
              srcSet="https://cdn.builder.io/api/v1/image/assets/TEMP/853e8a31096d54f4aa4c3f3e02fe0da30ec9abf828ee33437586dc025050b247?apiKey=7b4d2d38ea2048238943d95c83cb4f34&width=100 100w, https://cdn.builder.io/api/v1/image/assets/TEMP/853e8a31096d54f4aa4c3f3e02fe0da30ec9abf828ee33437586dc025050b247?apiKey=7b4d2d38ea2048238943d95c83cb4f34&width=200 200w, https://cdn.builder.io/api/v1/image/assets/TEMP/853e8a31096d54f4aa4c3f3e02fe0da30ec9abf828ee33437586dc025050b247?apiKey=7b4d2d38ea2048238943d95c83cb4f34&width=400 400w, https://cdn.builder.io/api/v1/image/assets/TEMP/853e8a31096d54f4aa4c3f3e02fe0da30ec9abf828ee33437586dc025050b247?apiKey=7b4d2d38ea2048238943d95c83cb4f34&width=800 800w, https://cdn.builder.io/api/v1/image/assets/TEMP/853e8a31096d54f4aa4c3f3e02fe0da30ec9abf828ee33437586dc025050b247?apiKey=7b4d2d38ea2048238943d95c83cb4f34&width=1200 1200w, https://cdn.builder.io/api/v1/image/assets/TEMP/853e8a31096d54f4aa4c3f3e02fe0da30ec9abf828ee33437586dc025050b247?apiKey=7b4d2d38ea2048238943d95c83cb4f34&width=1600 1600w, https://cdn.builder.io/api/v1/image/assets/TEMP/853e8a31096d54f4aa4c3f3e02fe0da30ec9abf828ee33437586dc025050b247?apiKey=7b4d2d38ea2048238943d95c83cb4f34&width=2000 2000w, https://cdn.builder.io/api/v1/image/assets/TEMP/853e8a31096d54f4aa4c3f3e02fe0da30ec9abf828ee33437586dc025050b247?apiKey=7b4d2d38ea2048238943d95c83cb4f34&"className="aspect-[1.1] object-contain object-center w-full self-stretch overflow-hidden grow max-md:max-w-full max-md:mt-10"
            />
          </div>
          <div className="flex flex-col items-stretch w-6/12 ml-5 max-md:w-full max-md:ml-0">
            <div className="justify-between items-stretch self-stretch flex grow flex-col max-md:max-w-full max-md:mt-10">
              <h2 className="text-white text-opacity-80 text-3xl font-semibold max-md:max-w-full">
                지금 바로 필사를 시작해보세요.
              </h2>
              <p className="text-white text-lg mt-8 max-md:max-w-full">
                필사는 외국어 학습에 유익한 방법입니다. <br /> 좋은 글을 따라 쓰면서 어휘력과 문장 구조를 향상시키며, 다양한 표현과 스타일을 배울
                수 있습니다. 더불어 문화적 이해와 자극을 받아 자기 향상에 도움이 됩니다.
              </p>
              <div className="items-stretch flex gap-5 mt-8 pr-5 max-md:max-w-full max-md:flex-wrap">
                <button
                  className="text-white text-opacity-70 text-xl font-semibold whitespace-nowrap justify-center items-stretch bg-white bg-opacity-40 grow px-8 py-2.5 rounded-[50px] max-md:px-5"
                  aria-label="ai 글감 생성하기"
                >
                  ai 글감 생성하기
                </button>
                <button
                  className="text-white text-opacity-70 text-xl font-semibold whitespace-nowrap justify-center items-stretch bg-white bg-opacity-40 grow px-6 py-2.5 rounded-[50px] max-md:px-5"
                  aria-label="인기 글감 둘러보기"
                >
                  인기 글감 둘러보기
                </button>
                <button
                  className="text-white text-opacity-70 text-xl font-semibold whitespace-nowrap justify-center items-stretch bg-white bg-opacity-40 grow px-9 py-2.5 rounded-[50px] max-md:px-5"
                  aria-label="직접 업로드하기"
                >
                  직접 업로드하기
                </button>
              </div>
              <h2 className="text-white text-opacity-80 text-3xl font-semibold mt-48 max-md:max-w-full max-md:mt-10">
                로그인을 하면 <br />더 다양한 서비스를 제공받을 수 있습니다.
              </h2>
              <div className="items-stretch flex justify-between gap-5 mt-5 pr-16 max-md:max-w-full max-md:flex-wrap max-md:pr-5">
                <div className="justify-center items-stretch bg-white bg-opacity-40 flex grow basis-[0%] flex-col px-8 py-4 rounded-[50px] max-md:px-5">
                  <div className="justify-between items-stretch flex gap-2.5 px-8 max-md:px-5">
                    <img
                      loading="lazy"
                      src="https://cdn.builder.io/api/v1/image/assets/TEMP/22b0ed2b5b33a1c52928c82bb8f01fcd2c83e33d24f7045fd4534e646c77f7f1?apiKey=7b4d2d38ea2048238943d95c83cb4f34&"
                      className="aspect-[0.92] object-contain object-center w-6 overflow-hidden shrink-0 max-w-full"
                      aria-role="presentation"
                      aria-label="Google 로그인 이미지"
                    />
                    <div className="text-white text-opacity-70 text-center text-xl font-semibold self-center grow whitespace-nowrap my-auto">
                      Google 로그인
                    </div>
                  </div>
                </div>
                <div className="justify-center items-stretch bg-white bg-opacity-40 flex grow basis-[0%] flex-col px-8 py-4 rounded-[50px] max-md:px-5">
                  <div className="justify-between items-stretch flex gap-2.5 px-9 max-md:px-5">
                    <img
                      loading="lazy"
                      src="https://cdn.builder.io/api/v1/image/assets/TEMP/d3ccb6f055452576f2dade865f3672b72965ca6516ec2d7a9e961e0842e410e7?apiKey=7b4d2d38ea2048238943d95c83cb4f34&"
                      className="aspect-[0.92] object-contain object-center w-6 overflow-hidden shrink-0 max-w-full"
                      aria-role="presentation"
                      aria-label="Apple 로그인 이미지"
                    />
                    <div className="text-white text-opacity-70 text-center text-xl font-semibold self-center grow whitespace-nowrap my-auto">
                      Apple 로그인
                    </div>
                  </div>
                </div>
              </div>
            </div>
          </div>
        </div>
      </section>
    </div>
  );
}

export default UpdatedComponent;
4. Locofy
꽤나 세세하게 코드 옵션을 설정할 수 있다.

import styles from "./IntroPage.module.css";

const IntroPage = () => {
  return (
    <div className={styles.introPage}>
      <div className={styles.writingWithABigPencil4910Parent}>
        <img
          className={styles.writingWithABigPencil4910Icon}
          alt=""
          src="/writingwithabigpencil49105564090719-1@2x.png"
        />
        <div className={styles.frameParent}>
          <div className={styles.parent}>
            <div className={styles.div}>
              <div className={styles.button}>
                지금 바로 필사를 시작해보세요.
              </div>
            </div>
            <div className={styles.div2}>
              <p
                className={styles.p}
              >{`필사는 외국어 학습에 유익한 방법입니다. `}</p>
              <p className={styles.p1}>
                좋은 글을 따라 쓰면서 어휘력과 문장 구조를 향상시키며, 다양한
                표현과 스타일을 배울 수 있습니다. 더불어 문화적 이해와 자극을
                받아 자기 향상에 도움이 됩니다.
              </p>
            </div>
            <div className={styles.group}>
              <div className={styles.div3}>
                <div className={styles.button}>ai 글감 생성하기</div>
              </div>
              <div className={styles.div3}>
                <div className={styles.button}>인기 글감 둘러보기</div>
              </div>
              <div className={styles.div3}>
                <div className={styles.button}>직접 업로드하기</div>
              </div>
            </div>
          </div>
          <div className={styles.container}>
            <div className={styles.div}>
              <div className={styles.button}>
                <p className={styles.p1}>{`로그인을 하면 `}</p>
                <p className={styles.p1}>
                  더 다양한 서비스를 제공받을 수 있습니다.
                </p>
              </div>
            </div>
            <div className={styles.frameDiv}>
              <div className={styles.div8}>
                <div className={styles.parent1}>
                  <img className={styles.icon} alt="" src="/@2x.png" />
                  <div className={styles.button}>Google 로그인</div>
                </div>
              </div>
              <div className={styles.div8}>
                <div className={styles.parent1}>
                  <img className={styles.icon} alt="" src="/@2x.png" />
                  <div className={styles.button}>Apple 로그인</div>
                </div>
              </div>
            </div>
          </div>
        </div>
      </div>
      <div className={styles.fillsa}>fillsa</div>
    </div>
  );
};

export default IntroPage;
플러그인 최종 선택
우선 4가지 플러그인 중에서는 Anima와 Locofy가 선택할 수 있는 옵션이 더 다양하고 코드도 더 깔끔해서 마음에 들었다. CSS 스타일링 옵션도 다양하고, 언어도 js와 ts 중에서 선택할 수 있다.
두 플러그인 중 한가지를 최종 선택하기 위해 코드를 zip 파일로 다운받아 직접 실행해보았다.
둘 다 zip 파일을 풀어준 후 'npm install', 'npm start run'을 차례로 실행시켜주었는데, Anima로 만든 파일은 에러가 뜨면서 바로 실행되지 않았고, Locofy로 만든 파일은 에러 없이 바로 실행되었다.
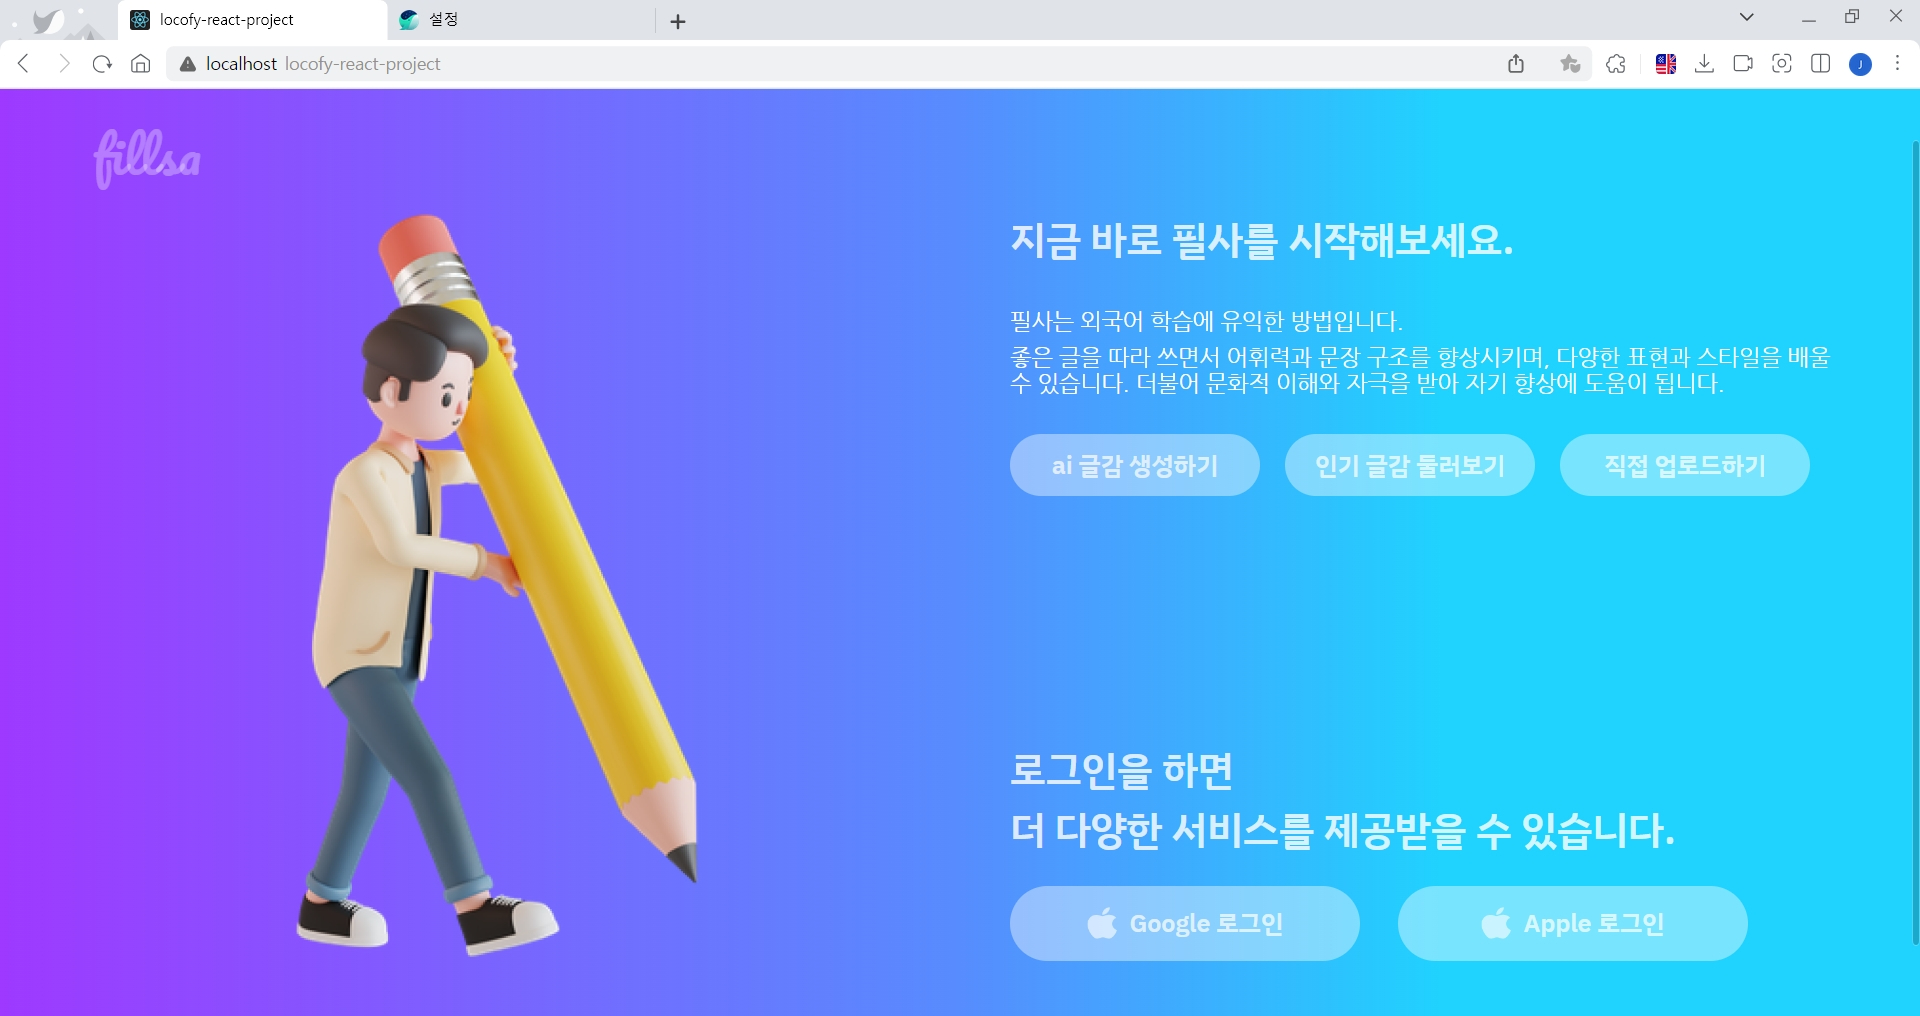
코딩 단 한 줄하지 않고 페이지 하나가 바로 완성됐다! 😲😲
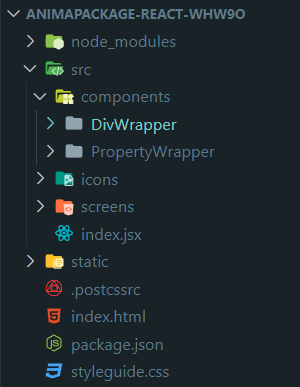

프로젝트의 디렉토리 구조 또한 Locofy가 평소 코딩하는 스타일과 더 비슷해서 최종적으로 Locofy 플러그인을 사용하기로 했다.
피그마로 코드를 생성해본 것은 이번이 처음인데 너무너무 편리한 기능인 것 같다. 특히 백엔드 개발을 지망하는 입장으로서, 퍼블리싱 시간을 많이 단축시킬 수 있을 것 같아서 좋다.
'IT 일상 > 프로젝트' 카테고리의 다른 글
| [사이드 프로젝트] fillsa 개발일지 007. 리액트 처음 세팅하기 (1) (0) | 2024.01.18 |
|---|---|
| [사이드 프로젝트] fillsa 개발일지 006. vite로 리액트 프로젝트 생성하기 (0) | 2024.01.09 |
| [사이드 프로젝트] fillsa 개발일지 004. 피그마로 목업 만들기 (0) | 2023.12.21 |
| [사이드 프로젝트] fillsa 개발일지 003. 로고 만들기 (0) | 2023.12.15 |
| [사이드 프로젝트] fillsa 개발일지 002. 프로젝트 생성하기 (0) | 2023.12.14 |
